Если ты гуглишь «nano banana 2 free», то, скорее всего, уже наигрался с обычными текстовыми промптами и уперся в потолок: одна картинка на выходе — это мило, но реальные задачи вроде рекламных карточек, кейсов «до/после» или серии постов для бренда требуют собирать сцену из нескольких кадров сразу. Вот тут начинается настоящая сила Nano Banana 2 — модель понимает не одну картинку, а связку картинок одновременно, вместе с их светом, перспективой и стилем. Дальше — весь воркфлоу от идеи до готовой сцены, с рабочими промптами, которые можно скопировать и подставить свои файлы.
Что такое Nano Banana 2 и почему все ищут «nano banana 2 free»
Nano Banana 2 — это не редактор с ручным маскированием и слоями, а модель, которая сама считывает пространственные отношения между объектами, согласованность света и перспективы, стиль и логику сцены. Из-за этого сложные композиции описываются обычным человеческим языком, а не набором технических операций. Если ты только начинаешь разбираться с базовыми режимами — есть смысл сначала заглянуть в пошаговый гайд по Nano Banana 2 для новичков, а здесь — уровень «мультиизображение и продвинутая композиция».
Модель умеет шесть базовых операций с несколькими картинками: блендинг, перенос элементов, перенос стиля, генерацию по референсам, сборку сложных сцен и удержание консистентности персонажа. Именно на этих шести китах и держится весь воркфлоу ниже — от простого слияния двух кадров до полноценной рекламной сцены с товаром, локацией и человеком.
Шаг 0. Прежде чем блендить — подбираем совместимые референсы
Половина неудачных композиций рождается не из плохого промпта, а из несовместимых исходников. Совместимые изображения обычно объединяет несколько признаков: похожий уровень разрешения и качества, совпадающее направление света, гармоничная цветовая палитра и (если это не задумано специально) единый художественный стиль.
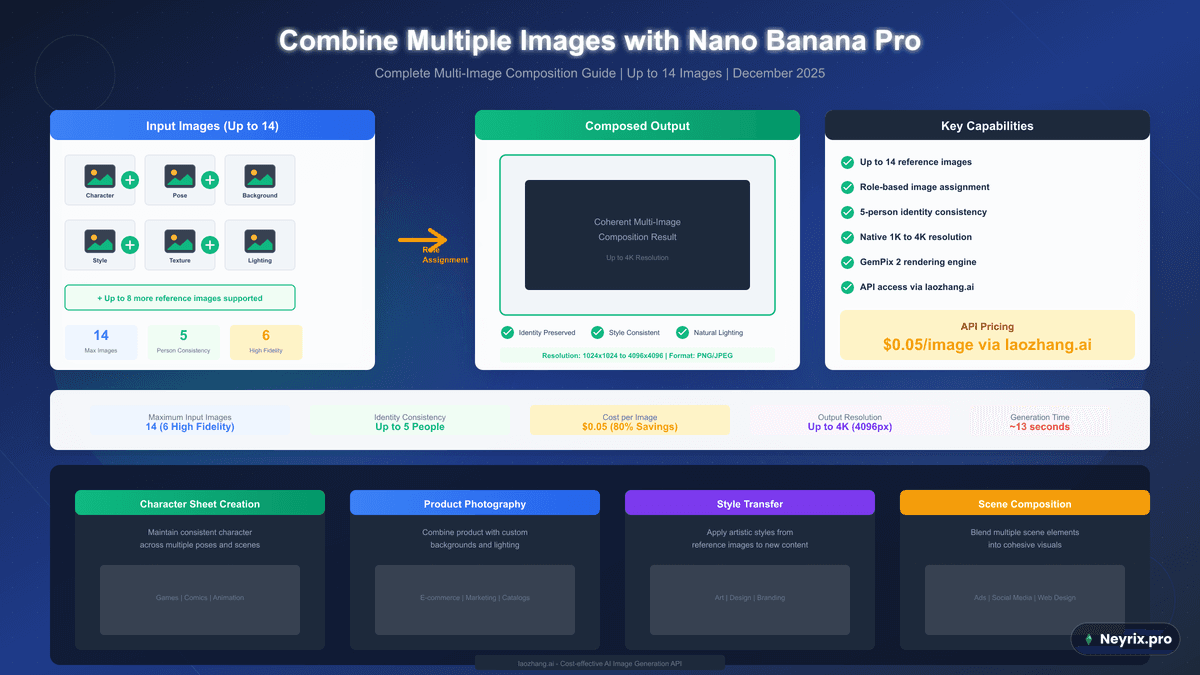
Базовый воркфлоу блендинга
Дальше — минимальная последовательность действий, чтобы слить два изображения в одну сцену, и первый рабочий промпт.
1. Select source images1. Select source images - Choose images with compatible lighting - Choose images with compatible lighting - Consider color palette harmony - Consider color palette harmony - Ensure resolution compatibility - Ensure resolution compatibility 2. Upload both images to Nano Banana 22. Upload both images to Nano Banana 2 3. Write blending prompt:3. Write blending prompt: "Blend these two images seamlessly, maintaining natural lighting "Blend these two images seamlessly, maintaining natural lighting and perspective, creating a cohesive single scene" and perspective, creating a cohesive single scene" 4. Review and refine4. Review and refine - Adjust blend strength if available - Adjust blend strength if available - Modify prompt for better results - Modify prompt for better results - Generate variations - Generate variationsШаг 1. Бесшовный блендинг: сливаем два кадра в один
Когда базовый промпт даёт «почти то, что нужно», следующий уровень — управлять тем, какое изображение доминирует, и как именно они должны соединиться.
Prompt: "Blend these images with 70% emphasis on the first image,Prompt: "Blend these images with 70% emphasis on the first image, maintaining the background from image 1 while incorporating maintaining the background from image 1 while incorporating the subject from image 2" the subject from image 2"Взвешенный блендинг задаёт процентное доминирование одной картинки — удобно, когда фон нужен от одного кадра, а объект от другого.
Prompt: "Merge these images by placing the person from image 1Prompt: "Merge these images by placing the person from image 1into the environment from image 2, adjusting lighting andinto the environment from image 2, adjusting lighting and shadows to match the scene naturally" shadows to match the scene naturally"Контекстный блендинг явно описывает роли: кто откуда и куда переносится, с перенастройкой света и теней под новую сцену.
Prompt: "Blend these images while preserving the warm, cozyPrompt: "Blend these images while preserving the warm, cozyatmosphere, ensuring color temperature remains consistentatmosphere, ensuring color temperature remains consistent throughout the composition" throughout the composition"Этот вариант держит эмоциональный тон сцены — полезно, когда важно не потерять атмосферу при слиянии разных по настроению кадров.
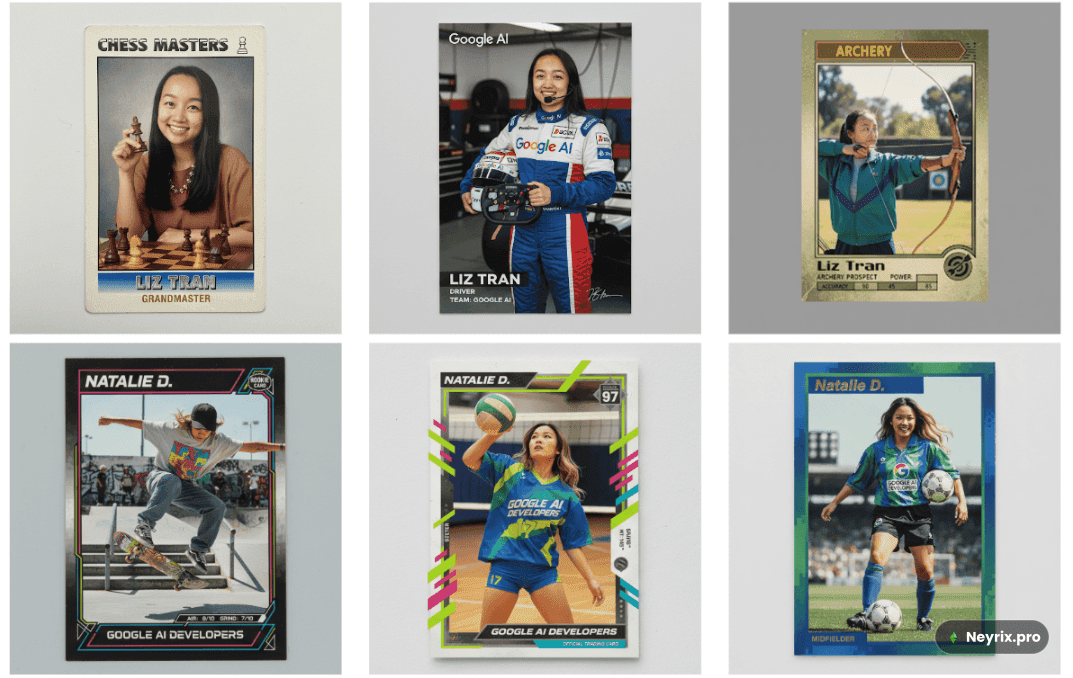
Практические кейсы блендинга
Три готовых сценария, которые закрывают большинство рабочих задач: карточка товара в контексте, композитный ландшафт и сравнение «до/после».
Image 1: Product on white backgroundImage 1: Product on white backgroundImage 2: Lifestyle scene (kitchen, office, etc.)Image 2: Lifestyle scene (kitchen, office, etc.) Prompt: "Place the product from image 1 naturally into thePrompt: "Place the product from image 1 naturally into thescene from image 2, matching lighting and creating appropriatescene from image 2, matching lighting and creating appropriate shadows and reflections" shadows and reflections" Result: Professional product-in-context imageryResult: Professional product-in-context imageryImage 1: Beautiful sky with dramatic cloudsImage 1: Beautiful sky with dramatic cloudsImage 2: Interesting foreground sceneImage 2: Interesting foreground scene Prompt: "Combine the dramatic sky from image 1 with thePrompt: "Combine the dramatic sky from image 1 with thelandscape from image 2, blending the horizon naturally andlandscape from image 2, blending the horizon naturally and maintaining consistent lighting throughout" maintaining consistent lighting throughout" Result: Stunning composite landscapeResult: Stunning composite landscapeImage 1: Before stateImage 1: Before stateImage 2: After stateImage 2: After state Prompt: "Create a side-by-side or split-screen compositionPrompt: "Create a side-by-side or split-screen compositionshowing both images with a clear, elegant transition between them"showing both images with a clear, elegant transition between them" Result: Compelling transformation storyResult: Compelling transformation storyШаг 2. Вырезаем элемент из одной картинки и вживляем в другую
Это самая практичная операция для e-commerce: взял объект с одного кадра, поместил в другую сцену, модель сама подгоняет масштаб, свет и перспективу.
Step 1: Upload source image containing desired elementStep 1: Upload source image containing desired elementStep 2: Upload target sceneStep 2: Upload target sceneStep 3: Describe the compositionStep 3: Describe the composition Prompt: "Take the [specific element] from the first imagePrompt: "Take the [specific element] from the first imageand place it [location] in the second image, adjustingand place it [location] in the second image, adjustingscale, lighting, and perspective to look natural"scale, lighting, and perspective to look natural"Image 1: Portrait of a personImage 1: Portrait of a personImage 2: Coffee shop interiorImage 2: Coffee shop interior Prompt: "Place the person from the first image sitting atPrompt: "Place the person from the first image sitting atthe corner table in the coffee shop scene, adjusting lightingthe corner table in the coffee shop scene, adjusting lightingto match the ambient interior light, with natural shadows"to match the ambient interior light, with natural shadows" Result: Person appears as if originally photographed in that locationResult: Person appears as if originally photographed in that location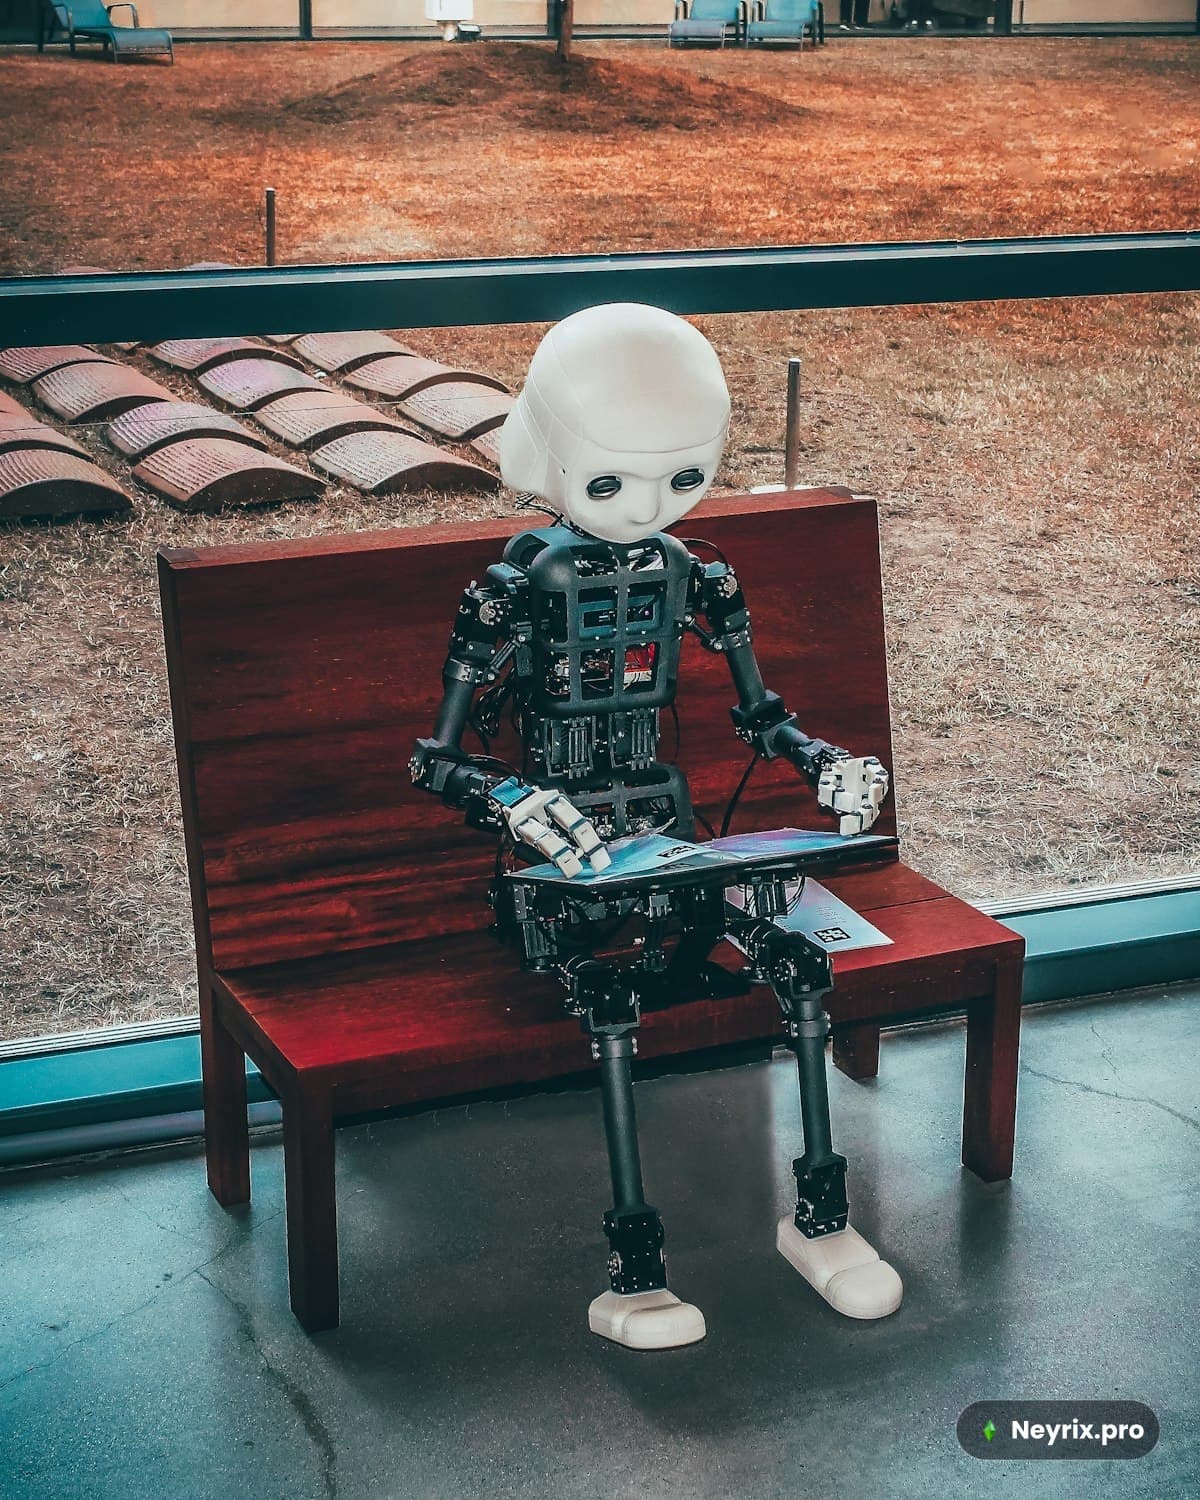
Композиция из нескольких элементов сразу
Если элементов больше двух — подключается третья картинка с реквизитом, и всё описывается в одном промпте.
Image 1: Subject/characterImage 1: Subject/characterImage 2: Background environmentImage 2: Background environmentImage 3: Props or additional elementsImage 3: Props or additional elements Prompt: "Create a composition with the character from image 1Prompt: "Create a composition with the character from image 1in the environment from image 2, incorporating the elementsin the environment from image 2, incorporating the elementsfrom image 3 naturally into the scene, ensuring cohesivefrom image 3 naturally into the scene, ensuring cohesive lighting and realistic spatial relationships" lighting and realistic spatial relationships"А для тонкой доводки есть три уточняющих приёма: подгонка перспективы, полная перезаливка света и контроль масштаба.
Prompt: "Place the object from image 1 into image 2, adjustingPrompt: "Place the object from image 1 into image 2, adjusting the viewing angle and perspective to match the scene's vanishing the viewing angle and perspective to match the scene's vanishingpoints, with appropriate foreshortening"points, with appropriate foreshortening"Prompt: "Insert the subject from image 1 into the scene fromPrompt: "Insert the subject from image 1 into the scene fromimage 2, completely re-lighting the subject to match theimage 2, completely re-lighting the subject to match thedirectional lighting, color temperature, and shadow patternsdirectional lighting, color temperature, and shadow patterns of the target environment" of the target environment"Prompt: "Place the object from image 1 into image 2 atPrompt: "Place the object from image 1 into image 2 atapproximately 1/3 the height of the background building,approximately 1/3 the height of the background building, ensuring realistic depth and atmospheric perspective" ensuring realistic depth and atmospheric perspective"Шаг 3. Стилевой трансфер: переносим не контент, а эстетику
Здесь вторая картинка не даёт объект, а задаёт «как это должно выглядеть» — цвет, текстуру, манеру. Базовый вызов выглядит так.
Image 1: Content (what you want to show)Image 1: Content (what you want to show)Image 2: Style reference (how you want it to look)Image 2: Style reference (how you want it to look) Prompt: "Apply the artistic style, color palette, and visualPrompt: "Apply the artistic style, color palette, and visualtreatment of image 2 to the content of image 1, maintainingtreatment of image 2 to the content of image 1, maintaining the subject and composition while transforming the aesthetic" the subject and composition while transforming the aesthetic"
Три практических применения: удержание фирменного стиля бренда, художественная интерпретация фото и историческая/винтажная стилизация. Если хочется собрать целую подборку арт-рецептов — есть отдельный разбор 7 стилей для Nano Banana Pro из одной фотографии.
Image 1: New photo shootImage 1: New photo shootImage 2: Established brand imageImage 2: Established brand image Prompt: "Transform image 1 to match the color grading, lightingPrompt: "Transform image 1 to match the color grading, lightingstyle, and overall aesthetic of image 2, ensuring brand visualstyle, and overall aesthetic of image 2, ensuring brand visual consistency" consistency" Use: Maintaining cohesive brand galleries and campaignsUse: Maintaining cohesive brand galleries and campaignsImage 1: PhotographImage 1: PhotographImage 2: Painting or artistic workImage 2: Painting or artistic work Prompt: "Reimagine the photograph from image 1 in the artisticPrompt: "Reimagine the photograph from image 1 in the artisticstyle of image 2, applying similar brushwork, color treatment,style of image 2, applying similar brushwork, color treatment, and compositional approach while keeping the photographic subject" and compositional approach while keeping the photographic subject" Use: Creating unique artistic content from photosUse: Creating unique artistic content from photosImage 1: Modern photoImage 1: Modern photoImage 2: Historical photo with desired era characteristicsImage 2: Historical photo with desired era characteristics Prompt: "Apply the vintage aesthetic, grain, color palette,Prompt: "Apply the vintage aesthetic, grain, color palette,and photographic characteristics of image 2 to image 1,and photographic characteristics of image 2 to image 1, creating a historically consistent appearance" creating a historically consistent appearance" Use: Period-appropriate content creationUse: Period-appropriate content creationА если стиль нужен частично, смешанно или дозированно — вот три продвинутых варианта: частичное применение только к фону, смешивание двух стилей в заданных пропорциях и контроль интенсивности.
Prompt: "Apply the style from image 2 to image 1, but only toPrompt: "Apply the style from image 2 to image 1, but only tothe background, keeping the main subject in original photographicthe background, keeping the main subject in original photographic style for contrast" style for contrast"Image 1: ContentImage 1: ContentImage 2: Style reference AImage 2: Style reference AImage 3: Style reference BImage 3: Style reference B Prompt: "Apply a blended style combining 60% of the aestheticPrompt: "Apply a blended style combining 60% of the aesthetic from image 2 and 40% from image 3 to the content of image 1" from image 2 and 40% from image 3 to the content of image 1"Prompt: "Apply the style from image 2 to image 1 with moderatePrompt: "Apply the style from image 2 to image 1 with moderateintensity (50%), maintaining some photographic realism whileintensity (50%), maintaining some photographic realism while incorporating artistic characteristics" incorporating artistic characteristics"Шаг 4. Reference-based generation: референс как гид, а не сырьё
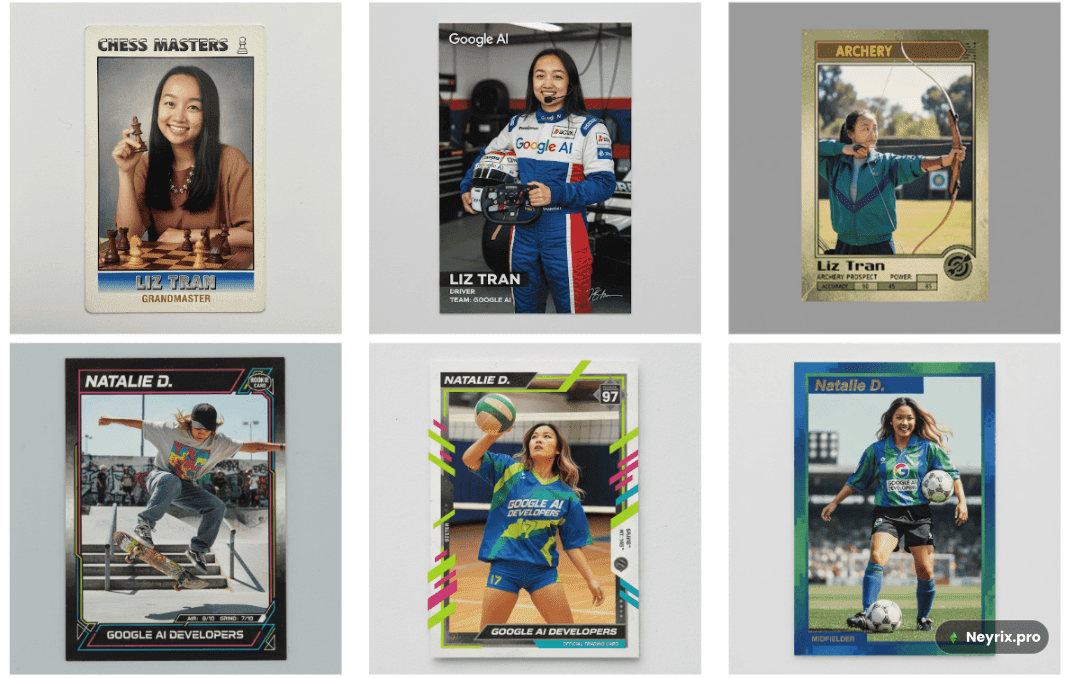
Отличие от блендинга принципиальное: здесь не сливают существующие картинки, а используют их как эталон для генерации нового кадра. Самый частый случай — удержание персонажа в новых сценах.
Step 1: Upload reference image of characterStep 1: Upload reference image of characterStep 2: Describe new sceneStep 2: Describe new scene Prompt: "Using the character appearance from the referencePrompt: "Using the character appearance from the referenceimage (same facial features, hair, clothing), generate a newimage (same facial features, hair, clothing), generate a newimage showing this character [in new situation/context],image showing this character [in new situation/context], maintaining exact character consistency" maintaining exact character consistency"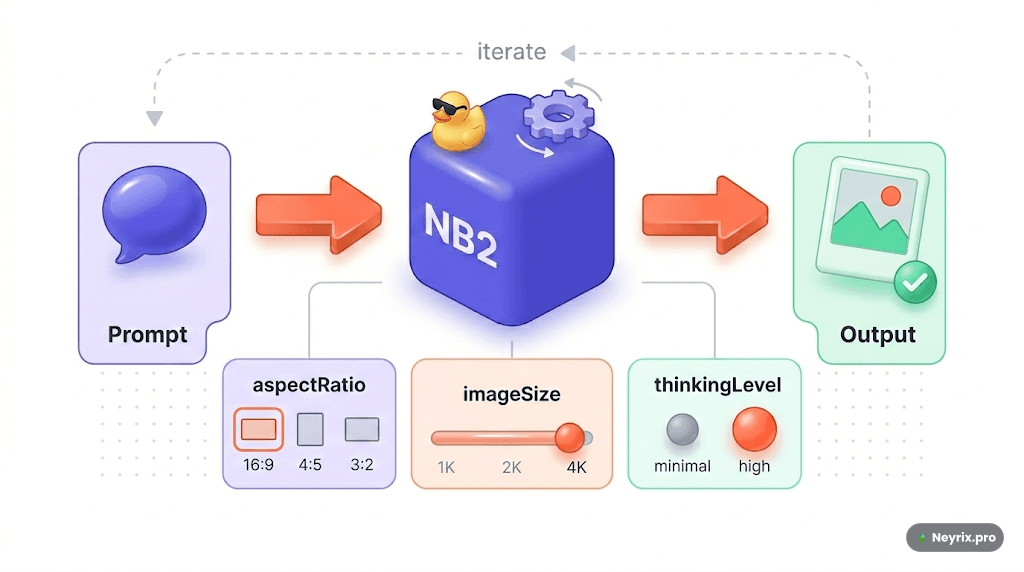
Наглядный пример из трёх генераций от одного и того же референса-робота — персонаж кочует по офису, пляжу и залу, оставаясь собой.
Reference: Portrait of a robot characterReference: Portrait of a robot character Generation 1:Generation 1:Prompt: "The character from the reference image workingPrompt: "The character from the reference image working on a laptop in a modern office" on a laptop in a modern office" Generation 2:Generation 2:Prompt: "The same character from the reference relaxingPrompt: "The same character from the reference relaxing on a beach at sunset" on a beach at sunset" Generation 3:Generation 3:Prompt: "The character from the reference exercisingPrompt: "The character from the reference exercising in a gym" in a gym" Result: Consistent character across completely different scenesResult: Consistent character across completely different scenesТот же принцип работает для эстетики и для композиции — референс может задавать не персонажа, а «настроение картинки» или «расположение объектов в кадре».
Reference: Image with desired visual styleReference: Image with desired visual style Prompt: "Generate a new image of [new subject] in the samePrompt: "Generate a new image of [new subject] in the samevisual style, color palette, lighting approach, and overallvisual style, color palette, lighting approach, and overall aesthetic as the reference image" aesthetic as the reference image" Result: New content that feels part of the same visual familyResult: New content that feels part of the same visual familyReference: Image with ideal compositionReference: Image with ideal composition Prompt: "Generate an image of [new subject] following thePrompt: "Generate an image of [new subject] following thecompositional structure, framing, and spatial arrangementcompositional structure, framing, and spatial arrangement of the reference image" of the reference image" Result: New content with proven compositional effectivenessResult: New content with proven compositional effectivenessМожно и комбинировать: одна картинка отвечает за «кто», вторая — за «как выглядит», третья — за «как всё расставлено в кадре». Модель собирает всё это в одну инструкцию и генерирует новый кадр с учётом всех трёх ролей одновременно.
Шаг 5. Собираем сложную сцену слой за слоем
Сложную рекламную сцену не стоит пытаться собрать одним гигантским промптом — надёжнее идти фазами: сначала фон, потом главный объект, потом второстепенные детали, и только в конце — общая доводка.
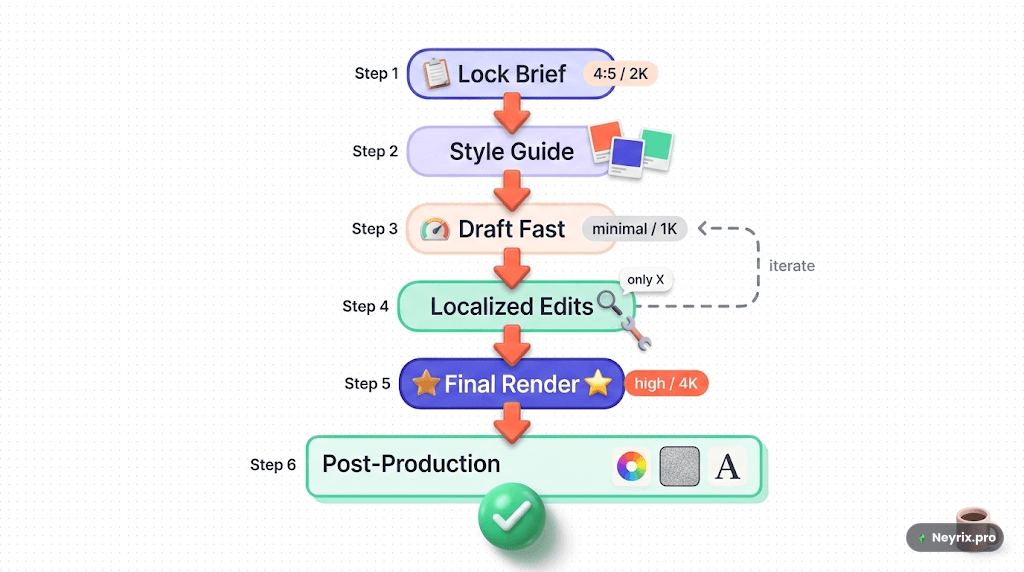
На примере сцены запуска продукта это выглядит так: сначала генерируется фон (современный офис с окнами и дневным светом), затем на стол в этой сцене помещается товар с фото на белом фоне с подгонкой света и отражений, затем в кадр добавляется человек, взаимодействующий с продуктом, и в финале — мелкие детали типа чашки кофе и блокнота для атмосферности. Каждый шаг — отдельная генерация на основе результата предыдущего, а не одна попытка «размешать всё сразу».
Отдельно можно усилить настроение уже готовой композиции — добавить тёплый свет золотого часа, лёгкую дымку в лучах света, мягкое бокэ на фоне и общую теплоту цвета. Это последний штрих, который поднимает картинку с уровня «нормально» до уровня «хочу сохранить в референсы».
Шаг 6. Держим персонажа одинаковым во всех сценах
Для маркетинга и сторителлинга критично, чтобы один и тот же герой выглядел одинаково в десяти разных постах. Рабочий подход — построить целую «библиотеку персонажа»: базовый референс, набор ключевых поз (стоя, сидя, идёт, показывает жестом, портрет крупным планом), набор эмоций (радость, удивление, задумчивость, восторг, тревога) и набор контекстов (офис, дом, природа, тусовка, путешествие).
Отдельно можно удерживать не только лицо, но и предмет в руках персонажа — актуально для брендового маскота с продуктом в разных сценариях. И отдельно — вариации гардероба: тот же герой (те же черты лица, тип фигуры, пропорции), но в другой одежде и другой обстановке, что закрывает сезонные кампании без пересъёмки.
Профессиональные фишки, чтобы не тратить генерации впустую
Есть универсальная формула, по которой удобно собирать любой сложный промпт для мультикомпозиции: операция + источник + цель + технические требования + эстетические требования.
[Operation] + [Source Specification] + [Target Specification] +[Operation] + [Source Specification] + [Target Specification] +[Technical Requirements] + [Aesthetic Requirements][Technical Requirements] + [Aesthetic Requirements] Example:Example:"Blend [operation] the portrait from image 1 and landscape from image 2"Blend [operation] the portrait from image 1 and landscape from image 2[source specification] by placing the person in the right third of the[source specification] by placing the person in the right third of thescene [target specification], maintaining sharp focus on the subjectscene [target specification], maintaining sharp focus on the subjectwith soft bokeh background [technical requirements], in warm goldenwith soft bokeh background [technical requirements], in warm goldenhour lighting with rich colors [aesthetic requirements]"hour lighting with rich colors [aesthetic requirements]"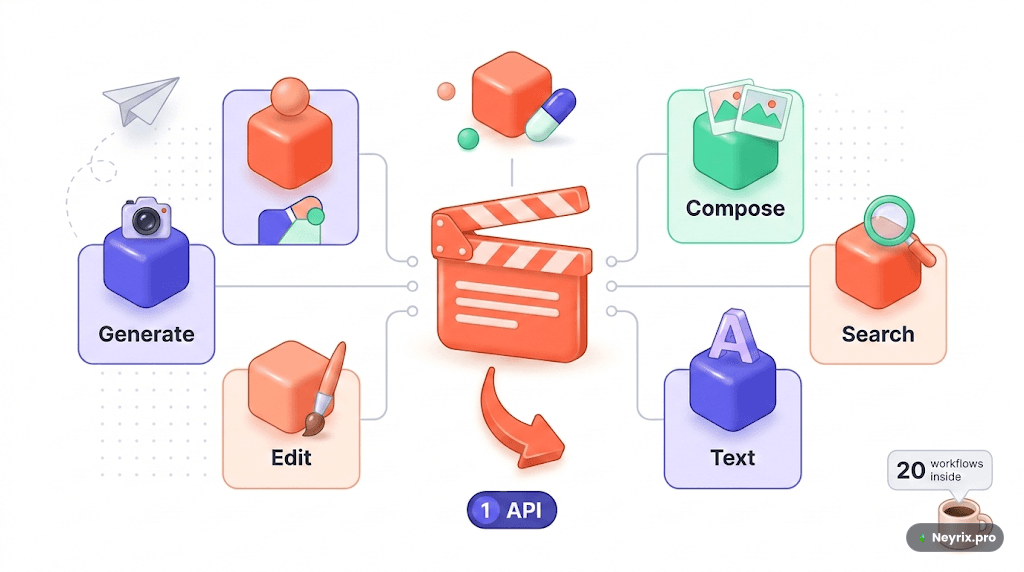
Дальше — короткий список правил, которые реально экономят генерации:
- Точность формулировок. Вместо «Combine these images» пиши «Blend these images by placing the subject from image 1 in the foreground of the environment from image 2, matching the golden hour lighting and warm color temperature» — расплывчатый промпт получает расплывчатый результат.
- Итеративная доводка. Первая попытка — широкая инструкция, чтобы понять, как модель интерпретирует задачу; вторая — уточнение по результатам; третья — тонкая настройка деталей; четвёртая — финальная полировка. Идеала с первого раза ждать не стоит.
- Двухфазный подход. Сначала собери базовый композит через мультиизображение, потом добей его точечным редактированием: «сделай свет на объекте теплее», «сгладь переход между планами», «усили тени под предметом».
- Библиотека референсов. Сохраняй удачные референсы персонажей, эффективные стилевые примеры, полезные фоны и проверенные шаблоны композиции — это ускоряет каждый следующий проект.
Где модель пока спотыкается
| Сложность | Что делать |
|---|---|
| Очень сложные сцены с 5+ элементами | Разбивать на этапы, а не пытаться собрать всё одним промптом |
| Точный текст в композиции | Добавлять текстовые надписи в традиционных редакторах отдельно |
| Узкоспециальные технические требования | Комбинировать AI-генерацию с ручной доводкой |
| Фотореалистичные руки в сложных позах | Генерировать несколько вариаций и выбирать лучший |
Сколько времени и денег экономит такой воркфлоу
Разница с традиционной продакшн-цепочкой (фотограф, студия, ретушь) — не в разы, а на порядки. Вот два реальных сценария использования:
| Проект | Что делали | Время | Стоимость (ориентир в рублях) |
|---|---|---|---|
| Лайфстайл-библиотека из 50 изображений для линейки товаров | 5 фонов + 10 товаров × 5 контекстов, единый стиль на всё | 4 часа | $30–40 (≈2 700–3 600 ₽ по актуальному курсу) |
| Серия из 6 изображений маркетинговой кампании | Один персонаж, 6 сцен, единая цветокоррекция | 3 часа | $20–30 (≈1 800–2 700 ₽ по актуальному курсу) |
Для сравнения: та же лайфстайл-библиотека традиционной съёмкой обошлась бы в $15 000–25 000. Если хочется посмотреть, до каких безумных крайностей доводят эту технологию пользователи в реальной жизни, — есть отдельная подборка вирусных трендов и мемов с Nano Banana 2.
Если элементы не склеиваются: быстрый troubleshooting
Главный симптом неудачной композиции — видимые швы, несовпадающий свет и очевидная «фотошопность» результата. Первым делом проверь совместимость исходников из шага 0 — часто дело именно в разном направлении света или несовместимых палитрах. Если исходники в порядке, а швы всё равно видны — уточни промпт по формуле из раздела про фишки (операция + источник + цель + технические/эстетические требования) и добавь двухфазную доводку: сначала композит, потом точечное редактирование теней и переходов.
Nano Banana 2 free, Nano Banana 2 Pro и как попробовать без скачивания
Nano Banana 2 — облачная модель: скачивать её на компьютер незачем и негде, весь запрос «nano banana 2 pro скачать» обычно упирается в фишинговые сайты или обычные веб-интерфейсы под другим именем. Работать с ней нужно через браузер, загружая референсы и получая результат онлайн — собственно то, что мы делали все шаги выше.
Именно для этого удобна такая платформа, как Neyrix: там Nano Banana 2 доступна прямо в браузере, без установки, и на ней можно прогнать весь воркфлоу из этой статьи — от простого блендинга до многослойной рекламной сцены с персонажем — не разбираясь с отдельными API-ключами и лимитами разных сервисов.
Частые вопросы
Это модель для генерации и редактирования изображений, которая умеет работать сразу с несколькими картинками — понимает свет, перспективу и стиль каждой и умеет естественно объединять их в одну сцену по текстовому промпту.
Pro-версия ориентирована на более требовательную профессиональную работу с несколькими референсами и сложными композициями, тогда как базовая версия закрывает большинство повседневных задач блендинга и переноса стиля.
В маркетинговых материалах и разных сервисах название иногда пишут по-разному, но речь идёт об одной и той же линейке моделей с упором на мультиизображенческую композицию.
Сама модель облачная, и на некоторых платформах, включая Neyrix, доступны бесплатные пробные генерации — точные лимиты и условия стоит смотреть на конкретной площадке.
Нет, скачивать её не нужно и негде — это облачная модель, с которой работают через браузер, загружая изображения и получая результат онлайн, например на Neyrix.
Примеры воркфлоу обычно используют 2–3 изображения (персонаж, фон, реквизит); для сцен с пятью и более элементами модели советуют разбивать задачу на несколько последовательных этапов.